Pages

Showing posts with label Dessert. Show all posts

Sunday, November 17, 2013

Sugary Chocolate Chip Cookies


I'm baaaaaaack! In case you didn't notice, I took a break. A long break. My last post was in May. And it's November. What's up with that?

For starters. After a looooooong winter, South Dakota thawed out. Less time indoors meant less time on the computer, reading blogs, and creating blog posts. But don't worry. I still cooked for my family, and they have been well-fed the past six months.

Second on the list: I decided to participate in my local library's adult summer reading challenge. I read 20 (yes, twenty!) novels between June 1 and August 31. More time with my nose in a book meant less time on the computer, reading blogs, and creating blog posts. Before this summer, I can't remember the last time I read a book. Blogs, online articles, and magazines are usually my go-tos.


Finally. In August, I welcomed the opportunity to become a working-full-time-outside-the-home mom again. I love what I do (I develop educational resources for two entomologists. I know more about insects than I ever thought I would!); my supervisors are great people; the boys love daycare; and the family has adjusted to a new schedule. Less downtime during the day (i.e. nap time for the boys) meant less time on the computer, reading blogs...you get the idea. I’ve figured out how to balance my and my family’s schedules (for now), so I’m back to blogging. Yay!

But enough about me. I want to talk about these Sugary Chocolate Chip Cookies.


For the record, I think it’s a-ok to start baking for the holidays. It’s a wonderful way to spread some cheer, especially if you share your treats with others. That is, if you’re the sharing type of person. I usually am.

These chocolate chip cookies are extra-special: before they are baked the dough is formed into a ball and then rolled in sugar. Sparkling, pretty sugar. I mean look at how sparkling and pretty these cookies are.


Not only are these cookies pretty, but they are what chocolate chip cookies should be. They are soft and buttery—to the point of nearly melting in your mouth—and they are jam-packed with chocolate chips. What’s a chocolate chip cookie without chocolate chips? The sugary coating adds a slight crunch (I’m talking slightest of the slight) that’s unexpected but adds to the overall texture of the cookies.

I love how simple these cookies are to make, and they do not take much longer to prepare than regular CCCs. Garrison, my oldest helped me used a cookie scoop to form the balls, and he had the best time shaping them and rolling them in the sugar. The process is basically a 4-year-old’s dream.

And these cookies are basically my dream, too. Make them, and share them. Or not. It’s totally up to you!


Sugary Chocolate Chip Cookies

1 cup unsalted butter, room temperature
1/2 cup light brown sugar, packed
1/2 cup granulated sugar
1/2 tsp. vanilla extract
1 large egg, room temperature
2 cups all-purpose flour, sifted
1 tsp. baking soda
1 tsp. cream of tartar
1/4 tsp. sea salt
12 oz. package semi-sweet chocolate chips
Small bowl of granulated sugar for dipping/rolling

Preheat oven to 350F degrees. In a mixing bowl with a paddle attachment, combine butter, brown sugar, granulated sugar, and vanilla. Beat at medium speed until well-blended. Beat eg into creamed mixture. In a medium-sized bowl, combine flour, baking soda, cream of tartar, and salt. Pour into creamed mixture, and let it beat just until blended. Stir in chocolate chips with a spatula. Using a small cookie scoop, scoop dough. Form balls with the dough by rolling with the hands; dip and roll the balls into the small bowl of granulated sugar. Place dough balls on parchment-paper-lined cookie sheets 3 inches apart. Lightly press each ball with the palm of the hand; do not flatten the dough balls. Bake one cookie sheet at a time 8-10 minutes. Let cookies sit on cookie sheet 2-3 minutes after baking. Place cookies on cooling racks. They will be soft. Makes approximately 2-1/2 dozen cookies.

Ashley’s Recipe Box

Wednesday, May 1, 2013

Cheesecake Tart with Biscoff Cookie Crust


I have a confession to make. I signed up to bring a fruit pizza to a mom’s group breakfast meeting. But I brought this cheesecake tart instead. It’s not that I have anything against fruit pizza. Because I don’t. To quote my oldest, I brought this cheesecake tart “because I wanted to.”

I guess his reasoning for “washing” his face mid-afternoon and consequently soaking my bathroom counter AND his entire head of hair works for me, too. Did I just admit that? Yep, I totally brought this cheesecake tart because I wanted to.


I’ve really wanted to make a cheesecake tart for some time. I thought my breakfast meeting would be the perfect opportunity. Who doesn’t love dessert for breakfast?

I grew up having desserts for breakfast. Not all the time, but every time we had it in the house. It was (and still is) our way of life. A piece of birthday cake the morning after my big day? You bet. Chocolate chip cookies as soon as I wake up? Absolutely. A slice of pie with ice cream to get ready for the day? Game on.

Desserts never last long in our house. Obvs. You see why it makes perfect sense to bring a cheesecake tart to a breakfast meeting, don’t you?


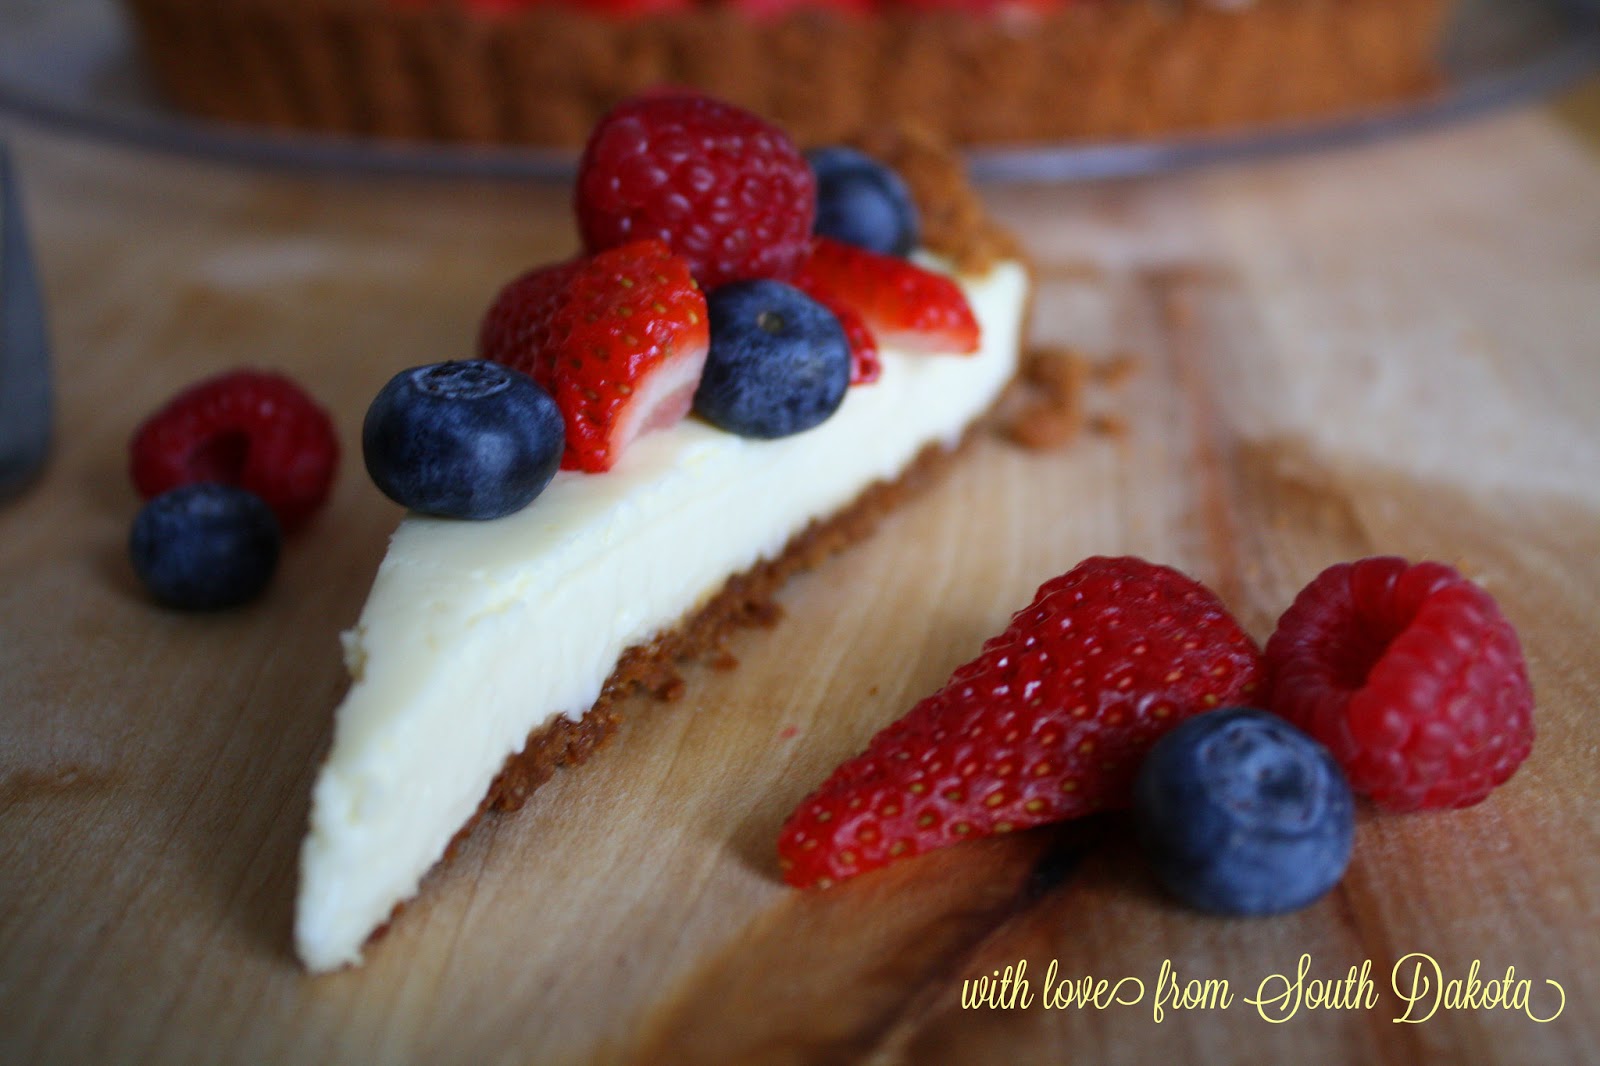
I adore this Cheesecake Tart with a Biscoff Cookie Crust for so many reasons. The crust is completely and utterly amazing. I do love me some Biscoff cookies, so it’s no wonder they make the perfect crust. And it’s so easy to make: cookie crumbs and butter, baby.

The cheesecake comes together quite effortlessly. Its vanilla flavor compliments the cinnamon-y crust so nicely. The crust and the cheesecake are truly a match made in heaven. The cheesecake ingredients are so simple, but the result is creamy fabulousness. Can you tell I love this tart?


As for the topping—which is totally optional—I thought fresh berries would look so pretty. And they definitely do. I also determined the addition of fruit would make this sort of like a fruit pizza. A deep dish fruit pizza.

Well, the ladies in my mom’s group must agree with me that this cheesecake tart is totally meant for breakfast. The entire thing was gone. Every. last. berry.
    
This is a simple dessert that exudes elegance. It would be perfect on a Mother’s Day brunch table or at a bridal shower. Oh, the possibilities!


Cheesecake Tart with Biscoff Cookie Crust
An Ashley Original Recipe

For the Crust:
36 Biscoff cookies
1/4 cup unsalted butter, melted
Unsalted butter for greasing the tart pan, cold

For the Cheesecake:
16 oz. cream cheese, room temperature
1/4 cup sour cream, room temperature
2 eggs, room temperature
1/2 cup sugar
1/2 tsp. pure vanilla extract

Preheat oven to 325F degrees. With cold butter, grease an 11-inch tart pan, making sure all of the crevices are greased.

With a food processor, process the cookies until they reach a fine texture. Add the melted butter and pulse a few times to fully incorporate. Pat crumbs in the tart pan evenly. The flat bottom of a glass may be helpful to pat the crumbs. Bake for 10 minutes. Remove from oven being careful not to push up on the bottom of the tart pan. Let cool.

In a medium bowl, combine the cream cheese, sour cream, eggs, sugar and vanilla. Using a hand mixer, beat the ingredients until well incorporated and smooth. Pour the cheesecake into the crust. Bake for 20 minutes or until the center only slightly jiggles. It will firm upon cooling.

Remove from oven and cool completely before putting in the refrigerator to store. Top with fresh berries or any other desired topping. Serves 12-16.

Friday, April 5, 2013

Giant Symphony Cookies for Two


Here I am, posting another cookie recipe. But this isn’t just any cookie recipe. It’s a cookie recipe that makes two as-big-as-your-face cookies. Do I need to mention these cookies have chocolate? No? That’s just too obvious…after all, this is a cookie recipe shared by me. I should probably specify the type of chocolate: Symphony candy bar pieces. They are unbelievably amazing in these cookies.

Giant Symphony Cookies are fit for a celebration. But not just any celebration.


As you might know, I’m a new food blogger. I started this blog in January. You and I are still getting to know each other. Something I haven’t shared with you yet (and I can’t believe it!) is that I am a Chi Omega. That’s right. I’m Greek. And I’m proud of it. The X and the Horseshoe are my letters.

It’s because of Chi Omega that I have an obsession with owls; I think the colors Cardinal and Straw are totally meant for each other; and I believe the white carnation is one of the most beautiful flowers. Ever.

Bid Day 2003 (freshman year) with my pledge sisters Megan and Brianne.

Oh yeah. And it’s because of Chi Omega that I have made the very best friends I could ask for. Women of all ages and from all walks of life. Talented, driven women. Compassionate, selfless women. Leaders, volunteers…I could really go on and on. Really. My sisters are incredible.

Bid Day 2004 with Amberly and Stephanie. We lived on the same dorm floor freshman year.

Today, April 5, Chi Omega celebrates 118 years. 118 years! Since 1895, Chi Omega has been changing the lives of collegiate women for the better, providing them with leadership, service and learning opportunities, friendships that last a lifetime, and sweet memories.

My younger sister Courtney, who initiated in January 2006, at a country-themed date party.

My Executive Board in Fall 2005. I got the privilege to serve the chapter with these inspiring women.

One of my favorite memories was the first time I ever heard Chi Omega’s The Symphony. I was a soon-to-be college freshman at the University of Nebraska-Lincoln. I remember sitting in the living room of the Chi Omega chapter house during a formal Recruitment event. A handful of Chi Omega sisters shared, in such touching ways, why they decided to choose Chi Omega. Then, before I knew it, the lines of a poem, I determined, were being shared, with a different sister reciting each line. It was so beautiful. And I was so captivated. And I had goose bumps. At that moment, I knew that I wanted to be a part of a sisterhood that believed the words they were saying. I could feel their love for Chi Omega. I could feel their pride in Chi Omega. Chi Omega was calling me, and I was listening.

The Symphony

To live constantly above snobbery of word or deed;
to place scholarship before social obligations and character before appearances;
to be, in the best sense, democratic rather than 'exclusive', 
and lovable rather than 'popular';
to work earnestly, to speak kindly, to act sincerely, to choose thoughtfully that course which occasion and conscience demand;
to be womanly always; to be discouraged never;
in a word, to be loyal under any and all circumstances to my Fraternity and her highest teachings and to have her welfare ever at heart that she may be a symphony of high purpose and helpfulness in which there is no discordant note.
 
Ethel Switzer Howard, Xi Chapter
1904

Isn’t The Symphony beautiful? And so encouraging?

In case you were wondering, I got goose bumps just typing it.

I think it’s perfect to celebrate the 118th anniversary of Chi Omega’s Founder’s Day with a sweet treat that incorporates the Symphony candy bar. It’s only appropriate. And what’s better than a make-one-to-eat-and-a-make-one-to-share recipe? These Giant Symphony Cookies are buttery and chocolate-y. The edges are slightly crispy, but they mostly have a melt-in-your-mouth texture. So that makes them the all sorts of irresistible. 


I chose to use a Symphony bar with almonds and toffee chips. I can’t resist anything with toffee, so it was a must for me. You can use the creamy milk chocolate (plain) bar. Your call. Rather than chopping up the bar, I broke the chocolate rectangles into small pieces with my hands. I worked rather quickly so I wouldn’t create a melt-y mess. Chopping chocolate can be kind of a pain because of the tiny pieces that get everywhere. But, if you would rather chop, don’t let me stop you!


The dough comes together quickly and easily. Once the dough ingredients are incorporated well, the Symphony chocolate pieces are added in, and mixed gently with a spatula. It’s the same process you follow when making chocolate chip cookies. You know what I’m sayin’.

After the dough is shaped into two very round and tall balls on a parchment-lined baking sheet, a few more Symphony pieces are strategically placed on top each. It’s like putting the bow on a present. Or the cherry on a sundae.


The cookies will spread during baking. Towards the end of baking time, you will want to watch the cookies to be sure they don’t get too crispy or brown (unless that’s how you like them). When I took these out of the oven, the edges were slightly brown, and the center was a tad soft. Perfection.

The best part about this recipe is that it makes two cookies. One of these cookies is meant to be shared. Enjoy it in the company of a good friend (over a cup of coffee, of course) or wrap it up and gift it to a sister. It’s the perfect way to celebrate a friendship!

Happy Founder’s Day, Chi Omega! 118 years strong. I’m so proud of and thankful for our sisterhood.

The ladies of my pledge class on our last Bid Day in 2006.

I am a Chi Omega.


I am the first in my family to “Go Greek.” I pledged Kappa Chapter at the University of Nebraska-Lincoln in August 2003, and I initiated in January 2004. After graduation, I moved to West Lafayette, Indiana, to attend graduate school at Purdue University. It was there, at Chi Beta Chapter, that I began advising, and I served as New Member Educator Advisor. After I graduated, my husband and I moved to Manhattan, Kansas, so he could pursue his Ph.D. at Kansas State University. At Kappa Alpha Chapter, I served as Personnel and Scholarship Advisor. Last fall after my husband’s graduation, we moved to South Dakota. I have connected with the women of Xi Theta Chapter at South Dakota State University, and I look forward to transitioning onto their advisory board in the near future. I am so grateful that I have remained involved with Chi Omega beyond my college years. I’ve had so many wonderful experiences and opportunities that I could never have imagined. I truly believe Chi Omega is for a lifetime.

If you are interested in learning more about Chi Omega, I encourage you to visit the Fraternity’s website
.


Giant Symphony Cookies
Adapted from: Sally’s Baking Addiction 

4 Tbsp. unsalted butter, room temperature
4 Tbsp. granulated sugar
4 Tbsp. light brown sugar
1 egg
1 tsp. pure vanilla extract
3/4 cup all-purpose flour
1 tsp. baking soda
1/4 tsp. salt
4.75 oz. (XL-size) Symphony candy bar, in pieces and divided 
              (I found this in my grocer’s candy aisle)

Preheat oven to 350 F degrees. Line a large baking sheet with parchment paper. Set aside.

In a small bowl, combine the flour, baking soda and salt. Mix well and set aside.

In a medium-sized bowl, mix the butter and sugars together with a spatula. Add the egg and vanilla and mix well. Pour the flour mixture into the wet ingredients. Mix to combine. With a spatula, gently fold in 12-rectangles’ worth of Symphony bar pieces.

Place the dough on the baking sheet, making two tall balls about 9 inches from each other. Use as spoon to shape the dough. With the remaining 4-rectangles’ worth of Symphony bar pieces, top the cookies.

Bake for 15-16 minutes, until the edges are lightly browned and the rest of the cookie appears somewhat soft. Allow the cookie to cool completely before removing from the baking sheet. Makes two giant cookies.

Friday, March 22, 2013

Caramel Egg(cellent) Chocolate Thumbprint Cookies


Here’s something I’m not afraid to admit: I get giddy when Easter candy hits store shelves. Like, I squeal in delight when I see it. Even before Valentine’s Day. Easter candy is my most favorite candy. Ever.

Do I dare mention Reese’s peanut butter eggs?

How about Starburst jelly beans?

Mini eggs, anyone? The ones with the crunchy outer shell. Oh goodness.

Lindt. Gold. Bunny?

And, behold, Cadbury mini caramel eggs.


Those caramel-filled eggs are deliciousness wrapped in delicate gold foil. I can’t get over the ooey-gooey-ness of the caramel. You know. Oh, you know.

The mini eggs were just begging me to bake with them. And so I did. These Caramel Egg(cellent) Chocolate Thumbprint Cookies are one of the cutest, softest, and yummiest cookies I have ever made. And they’re easy! The hardest part is unwrapping the eggs…and maintaining enough self-control to not eat them. It took a lot for me.


The dough is very simple. When I bake, I like to use room temperature butter and eggs unless the method requires these ingredients be chilled initially. It was no different for these cookies. With room temperature butter and eggs, the dough mixed really well and evenly. So the dough maintained its shape during baking, I did chill the dough about 45 minutes after mixing. Rolling the dough into balls will warm the dough up a bit, so it’s good to have cold dough.


After rolling the dough into 1-inch balls (I used a small cookie scoop to help measure), they get rolled in sprinkles. Sprinkles! I just love the contrast of dark cookie dough and brightly-colored sprinkles. It just screams fun. A thumbprint cookie wouldn’t be a thumbprint cookie without, well, a thumbprint. After the sprinkle-covered dough balls are placed on the baking sheet, gently press the center of each ball with a thumb. Do not press so much that you touch the baking sheet with your thumb; just give them each a nice little press.

Here’s where you’ll need to plan ahead. I would suggest that the eggs are unwrapped before making the dough. The cookies only need to bake 7-9 minutes, and as soon as you pull the cookies from the oven, you’ll need to gently press an egg into each cookie. This needs to happen while the cookies are still warm, so the egg is nestled nicely into place.


Once you get the eggs into place, don’t touch them! The milk chocolate shell will become somewhat soft (but it should maintain its shape) and shiny, so you will want to give them time to set. It took not quite two hours for mine to set at room temperature.


I think these cookies would be extra-cute on an Easter dessert table or gifted in an Easter basket. Imagine the possibilities!


Caramel Egg(cellent) Chocolate Thumbprint Cookies
Adapted from: The Curvy Carrot

2/3 cup unsalted butter, room temperature
1/2 cup sugar
1/4 cup unsweetened cocoa
1/4 tsp. baking soda
1/8 tsp. salt
1 egg, room temperature
1 tsp. pure vanilla extract
1-1/4 cups all-purpose flour
1/2 to 2/3 cup sprinkles
About 20 Cadbury Mini Caramel Eggs

Preheat oven to 375 degrees. Unwrap Cadbury mini eggs and set aside.

In a large mixing bowl, beat the butter on medium speed for 30 seconds. Add sugar, cocoa, baking soda, and salt. Mix until combine, scraping the sides of the bowl as necessary. Beat in egg and vanilla until well combined. Add the flour and mix until well-incorporated. Chill the dough for 30-45 minutes.

Roll the dough into 1-inch balls. Roll balls into sprinkles to coat. Place balls 3 inches apart onto parchment-paper-lined baking sheets. Gently press a thumb into the center of each cookie to create an indentation. Bake cookies for 7-9 minutes (until edges are slightly firm). Immediately press a mini egg into each cookie’s center. Transfer to a wire rack and cool. Do not touch eggs until set, about two hours. Makes about 20 cookies.

Monday, March 11, 2013

Monica Geller's Kiwi-Lime Pie with a Coconut Crust


I just love it when the culinary stars align.

You see, today is my sister Granola Courtney’s birthday. Maybe you know her? And Thursday is Pi Day (but come on, it’s really Pie Day). And Sunday is St. Patrick’s Day. So yeah, there’s a lot happening this week.

How am I going to celebrate everything?


By having a slice of Monica Geller’s Kiwi-Lime Pie with a Coconut Crust, of course.

A few weeks ago, I realized that Courtney’s birthday, Pie Day, and St. Patrick’s Day would happen within a week of each other (as it happens every year…and I just realized this?!). I wanted to make something that was so Courtney, so pie, and so green. Thankfully, those culinary stars aligned, I saw their light, and well, the rest is this pie.

There’s a story behind this pie. Of course, there’s a story.

Courtney is a Friends fan. I am a Friends fan. Ross, Chandler, Joey, Monica, Rachel, and Phoebe sure know how to make us laugh, no matter how many times we witness their crazy antics. Can they BE any funnier?

It never gets old watching Ross teach Rachel how to do laundry (The One with the East German Laundry Detergent). It never gets old watching Phoebe give Monica the worst haircut known to woman (The One with Ross’s New Girlfriend). It never gets old watching Chandler and Joey realize they leave baby Ben on the city bus (The One with the Baby on the Bus).

Speaking of The One with the Baby on the Bus, that episode was the inspiration for this pie. In case you aren’t a Friends fan or you don’t remember the episode, the reason Chandler and Joey are watching baby Ben is because Monica has to take Ross to the hospital for a severe allergic reaction. To her pie. Because it’s so special. Because of the kiwi.

Just watch this video clip from that episode. Not the best quality video but funny nonetheless.


Because Courtney thinks watching Friends re-runs never gets old, too, I thought it would be perfect to create a birthday dessert for her inspired by the show. Then I remembered Monica’s extra-special pie and how obvious it was to make as a way to celebrate Pie Day. And then I realized a dessert that uses green ingredients would be the perfect way to commemorate a green holiday.

So see, the culinary stars aligned.

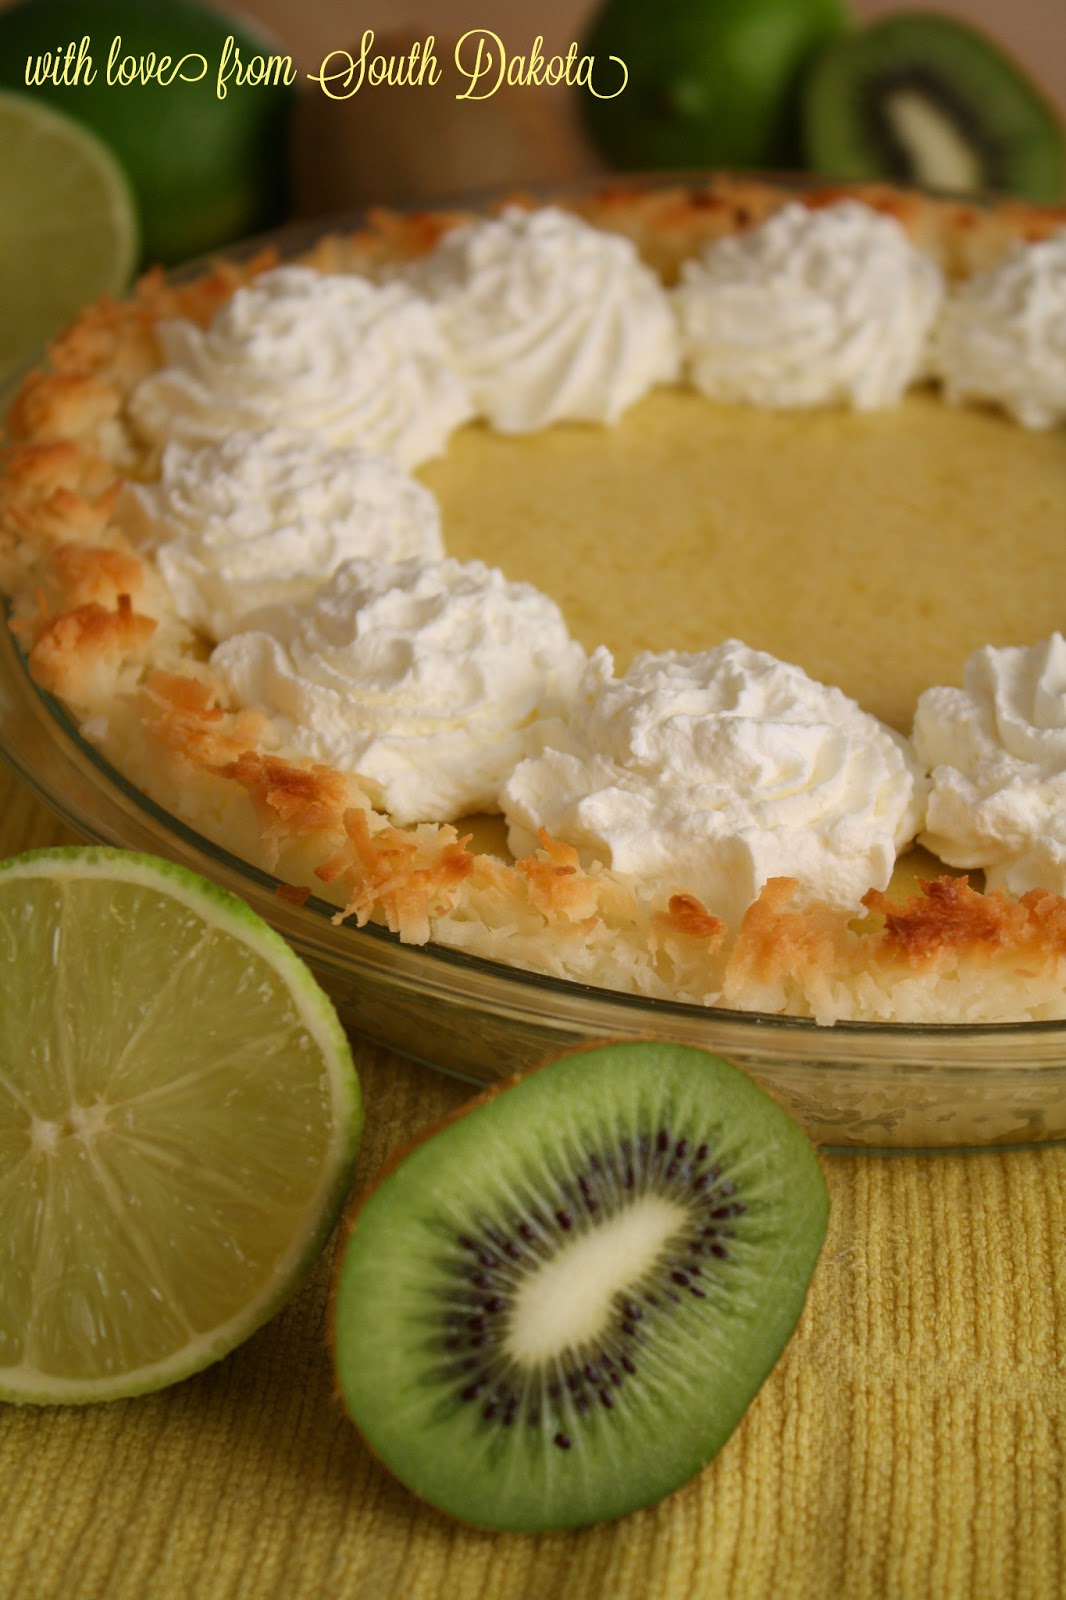
Monica Geller’s Kiwi-Lime Pie with a Coconut Crust is all sorts of deliciousness. The layers of kiwi-lime custard, whipped cream, and coconut crust make my taste buds sing in harmony.

This pie is a breeze to prepare. It does take a bit of time make. But that’s just pie-making for you.

There is a good balance of kiwi and lime in the custard. The kiwi isn’t distinctly identifiable, but it does make this pie special. The hardest (and I type that with air quotes) is juicing the kiwi. I have found that kiwi seeds, when ground like in a smoothie, almost have a spicy, throat-burning flavor. Do you know what I mean? Or am I the only one? I didn’t want to crush the kiwi seeds for fear of that bitter-spicy taste. But I also didn’t want to include the seeds in the pie (although you totally could) because Ross had NO idea there was kiwi in the pie. Kiwi seeds would have given away the special ingredient. To juice the kiwi, I cut off the skin, and pressed the fruit gently on a mesh sieve over a measuring cup. That seemed to do the trick.

As for the custard, it’s mainly just zesting a lime, cracking eggs, and whisking. Anyone can do it. You can do it.


Let’s talk about the coconut crust for a minute. For the first 23 years—plus or minus a year—of my sister’s life, she did not knowingly eat coconut. It was one of her most hated foods. Like, seriously. And she had a lot of hated foods. When Court found out our grandma used coconut in her monster cookies, something she mentioned by complete accident because she knew of my sis’ hatred, Court refused to eat them. Recently, she discovered that coconut wasn’t as bad as she thought and instead it is quite tasty. Now that she’s over her coconut aversion, I knew I had include coconut one way or another.

The coconut crust is a wonderfully sweet complement to the tangy kiwi-lime custard. Its flaky texture adds a tropical dimension to this delicious pie. Like if you took a bite with your eyes closed, you’d feel like you were sitting on a beach somewhere far, far away from South Dakota. The thing about the crust is that you need to watch it closely. Coconut can go from nicely browned to burnt pretty quickly. A foil ring or pie shield will help prevent a disaster, especially because this crust is baked twice, without and with the custard.

Of course, there is always a place for whipped cream on pie. So whipped cream on this pie is a total no-brainer.

Could this pie BE any more delicious? No, Chandler. No it cannot.


I want to wish you a very yummy Pie Day and a fun St. Patrick’s Day! But more importantly, I want to wish my baby sister a very happy 26th birthday!

Courtney, it is times like these that I wish the City by the Bay and The Small University Town in the Great Plains weren’t so far from each other. I’ll just have to eat a slice of pie to celebrate. And watch a birthday-themed episode of Friends. Maybe The One with Phoebe’s Birthday Dinner. Or The One Where They All Turn Thirty. All in your honor.


Monica Geller’s Kiwi-Lime Pie with a Coconut Crust
Adapted from: Martha Stewart
Adapted from: Two Tarts

Coconut Crust
2 Tbsp. butter, softened
3 cups sweetened shredded coconut

Kiwi-Lime Custard
1/4 cup kiwi juice, freshly juiced
2 Tbsp. lime juice, freshly squeezed
3 Tbsp. grated lime zest
1-3/4 cup + 2 Tbsp. sweetened condensed milk (this is 1-1/2 14-ounce cans)
5 large egg yolks, beaten

Whipped Cream
1 cup heaving whipping cream
1 Tbsp. powdered sugar (more or less to taste)
1 tsp. pure vanilla extract (more or less to taste)

Preheat oven to 350 degrees. To make the crust, combine butter and 1 cup of coconut in a food processor and process until mixture forms a balls, about 1 minute. Transfer to a medium bowl, and sprinkle the remaining coconut over mixture and mix well with hands. Press coconut mixture into the bottom of a 9-inch pie plate, leaving the edges fluffy and loose. Place a foil ring or pie shield over the crust edge to prevent burning. Place pie plate on a parchment-line baking sheet. Bake until center begins to brown, 7-10 minutes. Transfer crust to a wire rack and cool completely.

To juice the kiwi, peel the skin from the fruit. With a fine mesh sieve placed over a measuring cup, gently press the kiwi into the sieve.

To make the custard, combine kiwi juice, lime juice, lime zest, sweetened condensed milk and egg yolks in a medium bowl. Whisk until fully blended. Pour filling into the cool, prepared crust (depending on the depth of your pie plate, you may have filling remaining) and place foil ring or pie shield over the crust edge. Bake for 20-25 minutes, until set. Remove the foil ring or pie shield the last 3-5 minutes of baking to brown the edges. Transfer crust to a wire rack and cool completely.

To make the whipped cream, begin by chilling a mixing bowl and beaters or a whisk attachment by placing them in the fridge for 30 minutes or in the freezer for 10 minutes. When ready, remove bowl and beaters. Pour cream and sugar into bowl, and begin beating the cream on low speed for about 45 seconds. Increase the speed to high and continue beating until soft peaks form. Add vanilla and continue beating until incorporated. Note: I prefer to pipe whipped cream, so I beat the whipped cream until stiffer peaks form.

Serve the pie with whipped cream. If piping whipped cream onto the pie, refrigerate until serving and refrigerate leftovers in a well-sealed container. Note: I did not find that the coconut crust became soggy after refrigeration.

Makes one 9-inch pie.

Tuesday, February 26, 2013

Mint Chip Crispy Rice Treats


UPDATE 2/14/14: I'm thrilled so many of you are loving this recipe. It's certainly a popular one on Pinterest. I'd love to have you drop by my new site My Midwest Table and see what I'm posting there. Oh, and you can find these treats over there, too, in a great printable format!

There was a time in my life that I couldn’t make crispy rice treats. That was also the time in my life when I spent my summer babysitting the most fun kids ever, when I could eat as much Schwan’s Raspberry Rumble ice cream as I could stand and not gain pound, and when the most important decision I had to make was what swimsuit to wear to the pool. Oh, that was a good time.

Except for the fact that I couldn’t make crispy rice treats to save my life. Believe me, I tried. And I failed. Those kids I babysat? Yeah, they would tell you I failed. Terribly. Now, 11 years later, I look back on that time and wonder what the heck? How did I mess up crispy rice treats? How?

The treats were hard as a rock. No knife was going to cut them. So, doing what any great (?) babysitter would do, I turned this kitchen disaster into a learning moment. For the kids, of course. We threw that 9 x 13 inch brick of cereal into the yard, thinking (me hoping, really) the birds would love it and that we would be able to identify tons of them. Not a chance. No critter came close to it. You’re wondering if the Nebraska sun and humidity softened the brick? Hardly.

Fast forward to today. I am proud to report that I have conquered the crispy rice hill. That’s only slightly embarrassing.


These Mint Chip Crispy Rice Treats are ridiculously good. And soft. And such a festive dessert for March, especially when everyone’s thinking of and seeing green.

I attribute the softness of the treats to the whole stick of butter. You and I both know that more butter is better. The mint flavor in these treats is perfect. It isn’t too minty. Not like a stick of gum. That wouldn't be good. The chocolate mint topping takes these treats, well, over the top. Sorry not sorry for that play on words.


And of course, what’s Mint Chip Crispy Rice Treats without chips? The mini chocolate chips are the cutest sprinkled over the chocolate topping.


These treats have the seal of approval from my boys! Just look at those chocolate smiles.

I can guarantee you these won’t have to be thrown into the yard for the wildlife in your neighborhood. But they would probably enjoy the chocolate mint goodness.


 Mint Chip Crispy Rice Treats
An Ashley Original

Crispy Rice Treats
5-3/4 cups crispy rice cereal
8 tsp. (1 stick) unsalted butter
1 10.5 oz. bag marshmallows
3/8 tsp. mint extract
Green food coloring

Chocolate Mint Topping
1-1/2 cups semi-sweet chocolate chips
1/4 tsp. mint extract
1/3 cup mini semi-sweet chocolate chips (for sprinkling)

Butter (or spray with non-stick baking spray) a 8 in. x 8 in. OR a 9 in. x 9 in baking dish. Measure crispy rice cereal into a medium-sized bowl and set aside. In a large cooking pot, melt the stick of butter on medium-low heat. Add marshmallows to the pot. Stir constantly with a spatula to melt the marshmallows, creating a smooth mixture. Add mint extract and green food coloring to reach the color of preference. Add the crispy rice cereal and stir well, coating the cereal evenly by the marshmallow mixture. Pour the crispy cereal rice into the baking dish, and spread the cereal into the dish evenly with the spatula.

In a microwave-safe bowl or double boiler, melt the chocolate chips until they become smooth. Add the mint extract and stir well. Pour the chocolate onto the crispy rice treats, and spread the chocolate evenly over the treats. Sprinkle the mini semi-sweet chocolate chips over the melted chocolate. Cool completely and let the chocolate set before cutting. The treats may be refrigerated to set the chocolate quickly; remove bars about 20 minutes before cutting. Store in an air-tight container. Makes 9-16 treats, depending on the size cut.

Monday, February 11, 2013

Red Velvet Cheesecake Heart


Hooray for Valentine’s Day! I will admit that before I became a mom, I wasn’t really a fan of Valentine’s Day. Maybe because I wasn’t into all the mushy-gushy stuff. Maybe because I thought (and still do, actually) that love should be shown all days of the year. Maybe because my birthday falls exactly one week before, and well, I don’t like my day being overshadowed by hearts and shades of red. Wow, that makes me sound like a total diva.

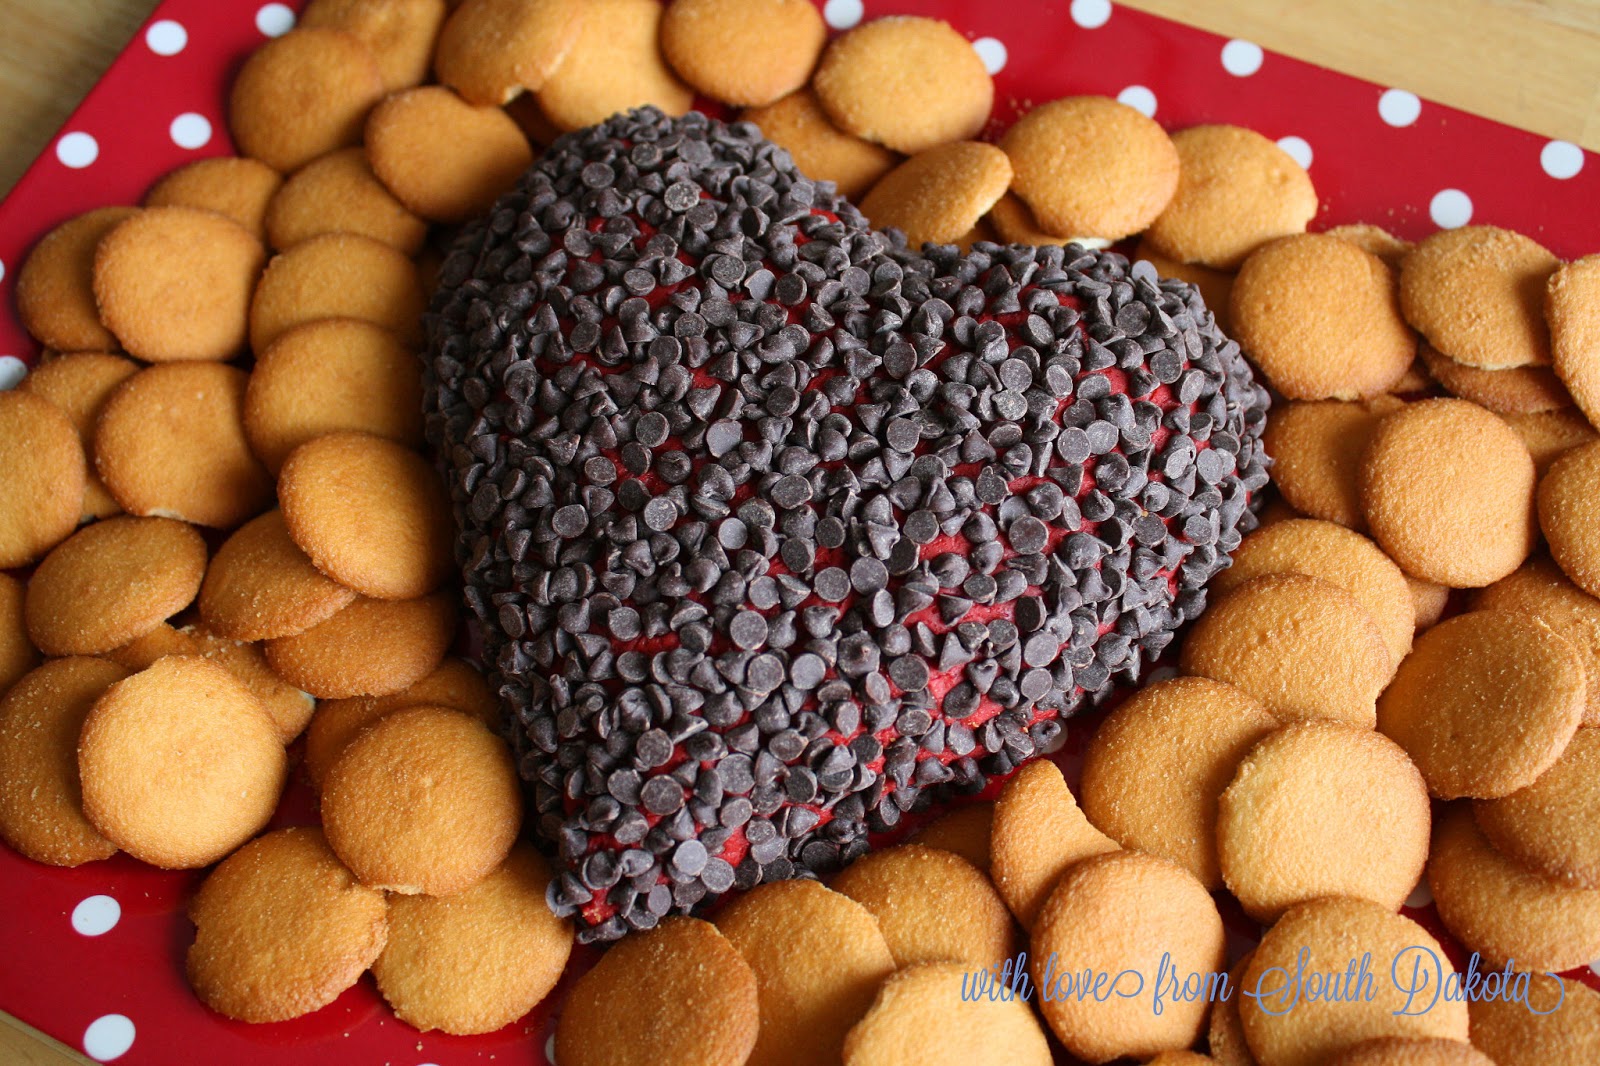
Things have changed. I am so excited for Valentine’s Day this year. My oldest, Garrison, is at a fun age to enjoy the holiday. Every time he sees a heart, he excitedly exclaims “Balentine’s day!” (and yes, that’s Valentine’s with a “b”). It’s so cute, and it really has me looking forward to celebrating this week! I am sure you can imagine how big his eyes were when he saw this beautiful Red Velvet Cheesecake Heart.


I pinned this recipe not too long ago, and I knew it would be a must-make this year. I was so excited to attend a potluck and Make-A-Wish fundraiser over the weekend. I’ll give you one guess for what I made. This cheesecake heart? You bet!

This dessert is such a breeze to prepare, and the ingredients are simple. I’m a lover of made-from-scratch cooking and baking, but sometimes boxed cake mixes are the way to go, and this was an instance in which I was glad to use a mix. The color of the heart, from the cake mix, is so gorgeous. The mini chocolate chips are great for finishing the heart, and they add a wonderful texture that complements the smoothness of the cheesecake and the crunchiness of the cookies.


Everyone you serve this to will be oohing and aahing over it. Guaranteed. It’s such a feast for the eyes and the tummy.

We’ll be celebrating the V-Day with our traditional heart-shaped homemade pizza—this year it will be barbeque chicken—and chocolate-covered strawberries. I can’t wait to spend the evening at home with my hubs and our two little Valentines!


Do you have any big plans? Please share! I wish you the happiest Valentine’s Day! Xoxo.


Red Velvet Cheesecake Heart
Adapted from: Fab Food 

8 oz. Neufchatel cheese or cream cheese, room temperature
1/2 cup unsalted butter, room temperature
1-1/2 cups red velvet cake mix, dry
1/2 cup powdered sugar
2 Tbsp. light brown sugar, packed
1/2 to 3/4 cup mini semi-sweet chocolate chips
Assorted cookies

In the bowl of a stand mixer, beat the cheese and butter until well combined and smooth. Add the cake mix, powdered sugar and brown sugar. Beat until well combined and smooth. Turn the mixture onto piece of plastic wrap. Using buttered fingers or a spoon, shape the cheesecake mixture into the shape of a heart, making the shape about 1-inch to 1-1/2-inches high. Wrap tightly in plastic wrap and place in the refrigerator for at least 2 hours.

Unwrap the cheesecake heart and place the bottom (flat side) on a serving plate or platter. With a small handful of chocolate chips, gently push the chocolate chips into the heart. Repeat until the heart is fully covered. Remove from the refrigerator about 20 minutes prior to serving. Serve with assorted cookies. Serves around 16.