Pages

Showing posts with label Brunch. Show all posts

Monday, December 16, 2013

Gingerbread Scones with Tart Lemon Glaze


Oops, I did it again.

You are shaking your head, aren’t you? You know I had to, given the ingredients for these scones. Here I am with another holiday-spice-and-citrus combination, and it’s a winner. In case you missed my last post, go read all about my Orange Pumpkin Holiday Cake.

Scones are the perfect example for why you should never judge a book by its cover. You should never judge a scone by its appearance. I am a big enough girl to admit it took me 28-and-a-half years (yes, just 3 months ago) to try a scone. You are shaking your head again, aren’t you?

I couldn’t get over the fact they look like big ol’ dense bricks of dough. I had a dear friend tell me she prefers scones to doughnuts. I love me some doughnuts, but I trusted her judgment. She’s got experience in the Pillsbury and Betty Crocker test kitchens, so yeah, she knows what she’s talking about.


So I jumped on the Scones Train and now I’m pretty much obsessed with them.

These Gingerbread Scones with Tart Lemon Glaze are incredible. Full of ginger, cinnamon, cloves, and molasses, they taste like Christmas. They are incredibly moist inside, but they have a good crust—you know like the kind banana bread fresh from the oven has. For this recipe, I used full flavor molasses, but you can certainly substitute your molasses preference. I decided to use dark brown sugar to bring more depth in the flavor of the scones. If you don’t have dark brown sugar on hand, light brown sugar will be just fine.

The original recipe stated to use a food processor to blend all the ingredients. Although purchasing a food processor was one of the best buys for me ever, I decided to mix everything up the old-fashioned way. I used a pastry blender to work in the butter, and after adding the milk and molasses, I used a spoonula (spatula + spoon) to finish blending the ingredients. This process worked well for me. My arm was slightly tired, but I knew that burning those extra calories are a good thing when it comes to making scones.


After the ingredients were well incorporated, I shaped the dough into a disk about 8 inches wide and about an inch thick. I dusted both sides with a little flour, and I cut the dough into 8 wedges. I transferred the wedges to a parchment-baking sheet about 1.5 inches apart. Here’s where the best scone-making secret I’ve ever learned, thanks to King Arthur Flour, comes in handy: place the pan, uncovered, in the freezer for 30 minutes. Why? So that you have more tender scones that rise higher, the freezer relaxes the gluten. Who doesn’t love thick, crumbly and flaky scones?

As for the glaze, it’s perfectly tart. My husband, who is not a lemon fan (but he wants you to know he does like lemonade), thought the glaze on the scones was a great addition. His take is that these scones are on the sweeter side, so the tart lemon glaze balances their sweetness. I like the lemon glaze because it’s fresh tasting, almost like bottled-up sunshine.


I just adore these scones, and I hope you do, too. Just a note from experience: you will like that I am sharing the hand-mixing method. That way when you’re reaching for your second scone and humming “Oops, I did it again…” you won’t feel so bad.


Gingerbread Scones with Tart Lemon Glaze

For the scones:

2 cups all-purpose flour
1/3 cup dark brown sugar, packed
2-1/2 tsps. ground ginger
1-3/4 tsps. baking powder
1-1/2 tsps. ground cinnamon
1/2 tsp. ground cloves
1/2 tsp. baking soda
1/4 tsp. sea salt
1/2 cup (1 stick) unsalted butter, cold and cut into 1/4-inch pieces
1/2 cup plus 2 Tbsp. cold buttermilk (or 2 tsp. vinegar topped with 1/2 cup milk + 2 Tbsp. milk)
2 Tbsp. molasses

For the glaze:
1/2 cup powdered sugar
1 Tbsp. lemon juice, freshly squeezed
1 tsp. lemon zest
2 tsp. milk (or enough to make desired consistency)

In a medium-sized mixing bowl, combine flour, brown sugar, ginger, baking powder, cinnamon, cloves, baking soda, and salt. Add butter, and blend in using a pastry blender until the pieces of butter are slightly larger than pea-sized. Whisk the buttermilk and molasses together in a small measuring cup, then add to the mixing bowl.

Shape the dough into a disk that is 8 inches in diameter and is 1 inch thick. Lightly cover the dough with flour. Using a sharp knife, cut the dough like a pizza into 8 wedges. Transfers the wedges to a parchment-lined baking sheet leaving 1.5 inches of space between them. Place the baking sheet in the freezer, uncovered, for 30 minutes. Preheat the oven to 425F degrees.

Bake scones for 15-16 minutes, until they are nicely browned and firm to the touch. Remove from the oven and transfer the scones to a wire rack to cool.

To make the glaze, combine powdered sugar, lemon juice, lemon zest and milk in a small bowl. Whisk the ingredients together until well combined. Drizzle glaze evenly over warm or cooled scones. Keep cooled scones in an air-tight container up to 3 days.

Makes 8 scones. 


Scone recipe adapted from Tracey’s Culinary Adventures

Thursday, May 30, 2013

Breakfast Pizza


Ummmm, it’s the end of May. How did this happen?

It’s been nearly a month since my last blog post. A MONTH! I didn’t intend to take a break, but May happened, that’s what.

My beautiful state decided it would thaw out this month. It was a loooooong winter. I bet you can agree if you’ve been following my posts and listening to (or is it reading about?) me gripe about it. But I survived my first South Dakota winter! I scooped boat loads of snow. I rocked a down, to-the-calf-length coat with a fur-lined hood on a daily basis. I endured frozen nose hairs walking through the grocery store parking lot. And I lived to tell the tale.


So what has May been like?

I can see my grass, my beautiful green grass. My neighborhood trees are covered with pink and white blossoms. Grape hyacinths and tulips are blooming everywhere. The sun rises before 6:00 and sets after 9:00, which means long, glorious days. Temperatures are perfect. My biggest dilemma is deciding whether or not to wear a sweatshirt on our evening walk. I know. Life problems.

May has been incredible.


So what has my family been up to? This month we traveled to Nebraska twice. The first visit was for a high school graduation. I used to babysit the graduate, and her family is great friends of my family. I seriously can’t believe I’m old enough that kids I babysat are now adults. So weird. And if that’s not weird enough, the second trip to Nebraska was spent reconnecting with my old classmates at our 10-year reunion. We met at a townie bar in our county, and I had so much fun. And yes, we did talk about how impossible it seemed that 10 years has passed since receiving our diplomas from good ol’ Fillmore Central High School.


On Mother’s Day, we welcomed a black lab puppy, Ruby Mae, to the family. Ruby is a great addition; we all love her. She is growing before our eyes, and the boys are learning to deal with a rapidly changing puppy. She enjoys running with (chasing now) Garrison, and she and Kase share an interest in sidewalk chalk, although I’m certain for different reasons. We are so thankful she is a well-behaved puppy. She still has her puppy-ness, but overall she is a calm girl who loves a good belly rub and wants nothing more than to sit on your feet/lap/wherever on your body she can. She’s going to be a great family dog.

Now that’s it finally spring, we have enjoyed many outings to our neighborhood parks. We have visited a local lake and had a picnic. So pretty. We have explored our town’s walking trails. They are perfect for a little boy who now has a big-boy bike and wants to practice his new skills.

But enough about us. How about this pizza? You already know about my family’s love of pizza. I’ve had this Breakfast Pizza in my blog-pocket for some time now, and it would be selfish not to share it.


This pizza has amazing flavor. Between the sausage, green chiles and cream cheese, it’s simply irresistible. So irresistible that we can polish off this bad boy in one sitting. And I’m not ashamed to admit it. And know that I won’t judge you if you do the same.

My favorite sausage, medium-spiced ground pork sausage, is sold by the pound. What I like to do is fry all the sausage, just as I cook ground beef, and drain the excess grease. I freeze half the sausage, and I use the other (warm) half for the pizza. The next time I get a craving for this pizza, all I need to do is thaw the sausage. So easy, and it is definitely a time-saving method.

I will try to post regularly again. I’ve been cooking and baking some great things, and I need to share them with you. I also have an idea for a blogging series that is just too fun and so me. I can’t wait to tell you all about it. Stay tuned!


Breakfast Pizza
Ashley’s Recipe Box

Recipe for your favorite pizza dough (for a 12-14 inch pizza)
1/2 pound pork sausage, any spice level
1 cup frozen hash browns, thawed
4 oz. cream cheese, cut into small cubes
4 oz. can diced green chiles, drained
1 cup shredded Monterrey Jack cheese
5 eggs
1/4 cup milk
1/2 tsp. salt (optional)
1/8 tsp. ground pepper (optional)

Preheat oven to 375F degrees. In a large pan, cook the sausage and drain. On a pizza pan or baking sheet, top the pizza dough with sausage. Sprinkle the dough with hash browns and green chiles. Place cream cheese cubes evenly over hash browns. Top with the shredded cheese. In a medium bowl, beat together eggs, milk, salt and pepper. Pour over the pizza. Bake for 20 minutes or until cheese and eggs are browned on top. Makes one 12-14 inch pizza.

Wednesday, May 1, 2013

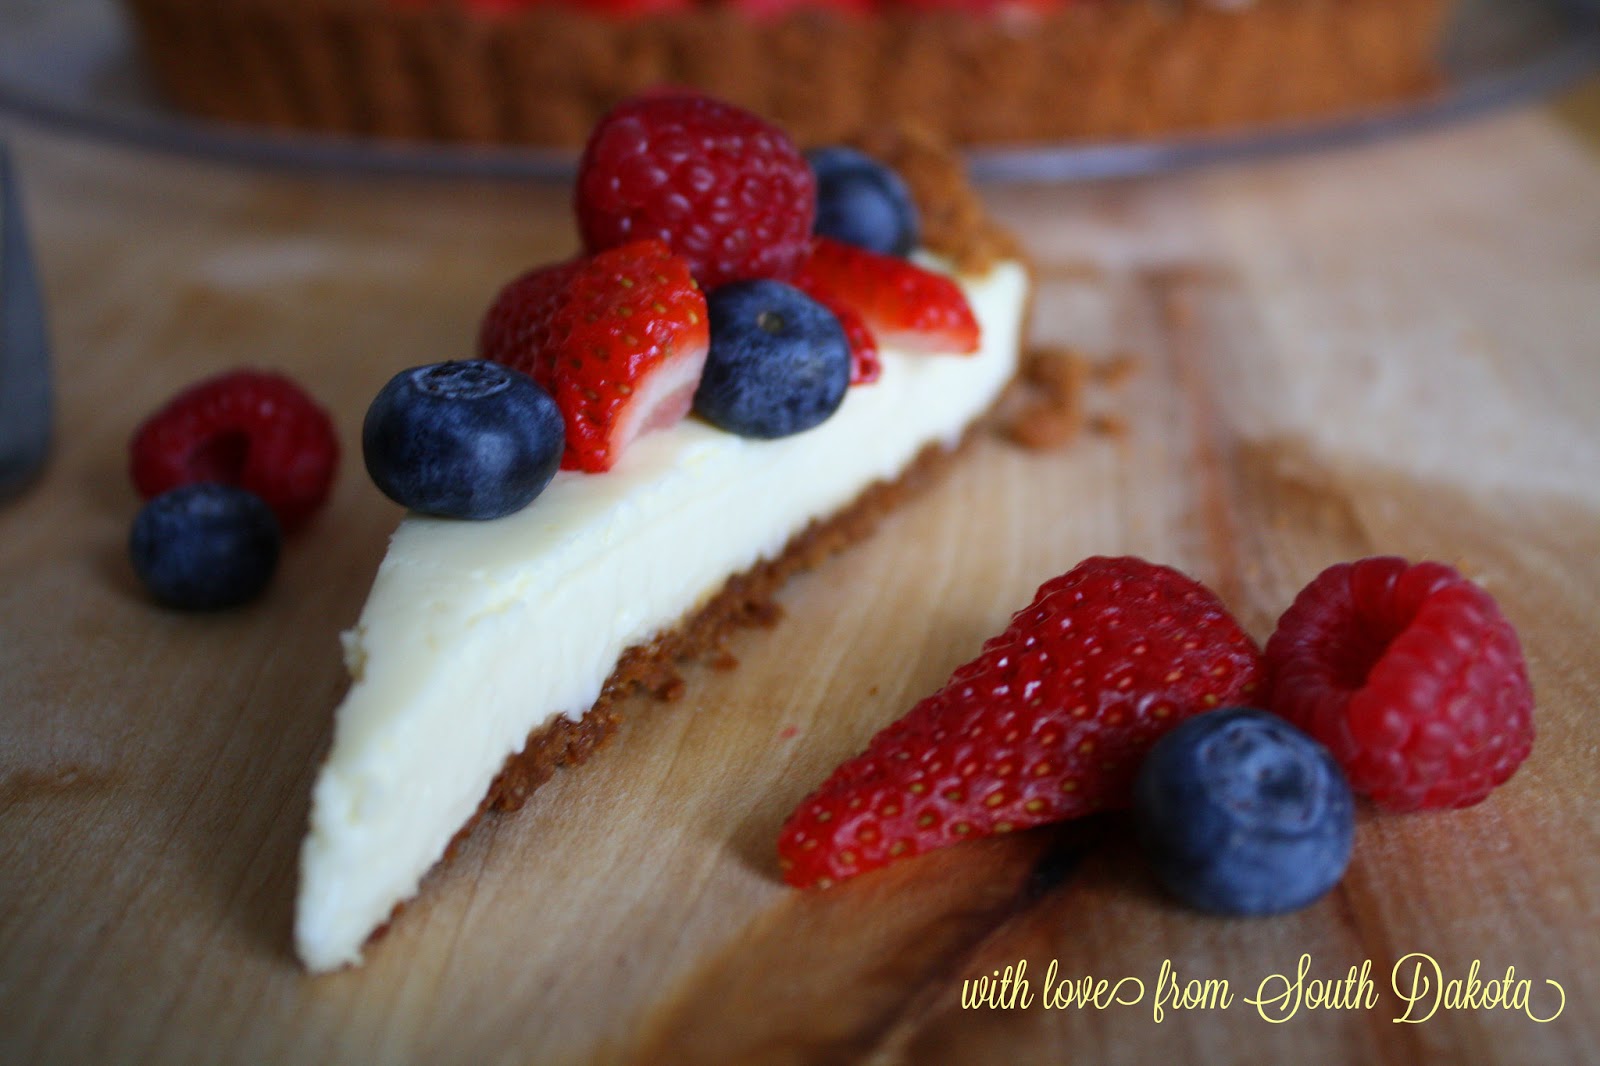
Cheesecake Tart with Biscoff Cookie Crust


I have a confession to make. I signed up to bring a fruit pizza to a mom’s group breakfast meeting. But I brought this cheesecake tart instead. It’s not that I have anything against fruit pizza. Because I don’t. To quote my oldest, I brought this cheesecake tart “because I wanted to.”

I guess his reasoning for “washing” his face mid-afternoon and consequently soaking my bathroom counter AND his entire head of hair works for me, too. Did I just admit that? Yep, I totally brought this cheesecake tart because I wanted to.


I’ve really wanted to make a cheesecake tart for some time. I thought my breakfast meeting would be the perfect opportunity. Who doesn’t love dessert for breakfast?

I grew up having desserts for breakfast. Not all the time, but every time we had it in the house. It was (and still is) our way of life. A piece of birthday cake the morning after my big day? You bet. Chocolate chip cookies as soon as I wake up? Absolutely. A slice of pie with ice cream to get ready for the day? Game on.

Desserts never last long in our house. Obvs. You see why it makes perfect sense to bring a cheesecake tart to a breakfast meeting, don’t you?


I adore this Cheesecake Tart with a Biscoff Cookie Crust for so many reasons. The crust is completely and utterly amazing. I do love me some Biscoff cookies, so it’s no wonder they make the perfect crust. And it’s so easy to make: cookie crumbs and butter, baby.

The cheesecake comes together quite effortlessly. Its vanilla flavor compliments the cinnamon-y crust so nicely. The crust and the cheesecake are truly a match made in heaven. The cheesecake ingredients are so simple, but the result is creamy fabulousness. Can you tell I love this tart?


As for the topping—which is totally optional—I thought fresh berries would look so pretty. And they definitely do. I also determined the addition of fruit would make this sort of like a fruit pizza. A deep dish fruit pizza.

Well, the ladies in my mom’s group must agree with me that this cheesecake tart is totally meant for breakfast. The entire thing was gone. Every. last. berry.
    
This is a simple dessert that exudes elegance. It would be perfect on a Mother’s Day brunch table or at a bridal shower. Oh, the possibilities!


Cheesecake Tart with Biscoff Cookie Crust
An Ashley Original Recipe

For the Crust:
36 Biscoff cookies
1/4 cup unsalted butter, melted
Unsalted butter for greasing the tart pan, cold

For the Cheesecake:
16 oz. cream cheese, room temperature
1/4 cup sour cream, room temperature
2 eggs, room temperature
1/2 cup sugar
1/2 tsp. pure vanilla extract

Preheat oven to 325F degrees. With cold butter, grease an 11-inch tart pan, making sure all of the crevices are greased.

With a food processor, process the cookies until they reach a fine texture. Add the melted butter and pulse a few times to fully incorporate. Pat crumbs in the tart pan evenly. The flat bottom of a glass may be helpful to pat the crumbs. Bake for 10 minutes. Remove from oven being careful not to push up on the bottom of the tart pan. Let cool.

In a medium bowl, combine the cream cheese, sour cream, eggs, sugar and vanilla. Using a hand mixer, beat the ingredients until well incorporated and smooth. Pour the cheesecake into the crust. Bake for 20 minutes or until the center only slightly jiggles. It will firm upon cooling.

Remove from oven and cool completely before putting in the refrigerator to store. Top with fresh berries or any other desired topping. Serves 12-16.

Friday, April 12, 2013

Banana Crumble Muffins


I’m going to talk about the weather again. I think I’m turning into my grandma. Bear with me.

So, yeah. We’re buried in snow. My husband took several measurements in various spots in our yard. You’re not surprised at me telling you he’s a scientist, are you? He lives for data collecting. The verdict: 13 inches. Over a foot of snow. Ewwww.

But when life gives you snow, you play in it. And that’s what we did.


Or you stay inside, watch Dinosaur Train and snack with Mom.


And boy did we do a lot of snacking. Let me tell you about these amazing Banana Crumble Muffins. They’re the perfect snack, breakfast, anything.


I’m pretty particular when it comes to the ripeness of bananas. I like them best when they are brightly yellow, slightly green at the top, and free of brown spots. There’s a small window I can eat them like this. As soon as the green is gone, I wish I could just snap my fingers and make them super-duper ripe. Waiting out banana ripening requires patience, and well, that’s not one of my strong suits.


Nathan, my husband, doesn’t have much of a sweet tooth, and he’s very particular about dessert-type foods. Who is this guy? To his credit, he does love brownies and muffins. I’m always looking for ways to turn ordinary brownies and muffins into extraordinary brownies and muffins. It’s fun for me, and I have to say, I think he likes my experiments.


I really like sour cream in muffins. I think it provides great flavor, and the end result is always a moist muffin. These muffins are so moist you don’t even need to butter them. I’m totally serious. And oh goodness. The crumble topping on the muffins is amazing. I really feel that all muffins need a crumble topping. That would be a perfect world.


I can’t get enough of these muffins and neither can Nathan. We’re waiting (me, rather impatiently) for the bunch of bananas sitting on our counter to ripen, so I can make them again. I hope you love them as much as we do.


Banana Crumble Muffins
Adapted from: Chefdruck

For the muffins:
4 Tbsp. unsalted butter, room temperature
1/4 cup sugar
1/4 cup light (or dark) brown sugar
1 egg
1 tsp. pure vanilla extract
3/4 cup all-purpose flour
3/4 tsp. baking soda
1/2 tsp. salt
2 large, very ripe bananas, mashed
1/4 cup sour cream

For the crumble topping:
3 Tbsp. unsalted butter, cold
3 Tbsp. light (or dark) brown sugar
3 Tbsp. all-purpose flour
3 Tbsp. old fashioned oats
3 Tbsp. sliced almonds (optional)

Preheat the oven to 350F degrees. Grease and flour a 12-cup muffin tin.

To make the muffin batter, cream together the butter, sugar, and brown sugar with a hand mixer in a large bowl. Add the egg and vanilla, beating well. In a separate bowl, combine flour, baking soda, and salt until well incorporated. Pour the flour mixture into the large bowl and mix with hand mixer until the flour mixture is well incorporated. Add the mashed bananas and sour cream to the batter and mix with a spatula until all the ingredients are mixed well.

Fill the muffin wells with the batter, evenly distributing the batter among the 12 cups. Set aside.

To make the crumble topping, cut the butter into small, pea-size pieces, using a knife, fork or pastry blender. Add the sugar, flour, and oats, and mash the mixture with a fork or pastry blender until the ingredients are incorporated yet crumbly. Sprinkle the crumble mixture evenly on top of each muffin. Sprinkle the almonds onto each muffin.

Bake for 28-30 minutes or until an inserted toothpick comes out clean. Serve warm or cooled. Store in an airtight container. Storing may cause the crumble to lose its crumbly-ness, but it is still tasty. Makes one dozen muffins.

Tuesday, January 15, 2013

Creamy Raspberry Spread for Banana Bread


Any way you slice it, banana bread is always good. I adore it. And so do all three of my boys. When I make a loaf, it rarely lasts a day. We eat it fresh from the oven, warm and smothered with butter. We eat it straight from the fridge, cold and smothered with butter (that preference is what my husband brought to our marriage). I guess you could say we’re smothering people. Sorry, just could resist that one.

If you’re like me, you probably have a go-to, no-fail banana bread recipe. I have seen tons of recipes that jazz up banana bread, but I just can’t go there. Call me a banana bread purist. I’m ok with that.

This is why I am so excited to share with you my re-creation of a fantastic and easy spread for banana bread. It’s a tasty enhancement to a not-a-fancy-but-tastes-so-good banana bread recipe. I haven’t had this spread in years, and I am so glad the memory of it came to me not long ago.

My dad would play golf in our local country club’s Member-Guest golf tournament every summer when I was growing up. It was a weekend for the guys, but the ladies—the wives and daughters of the members and the guests—found our fun, too. I always looked forward to this (usually smoldering) July weekend, especially brunch at a family friend’s house. Doris hosted the ladies in my parents’ circle of friends for the Saturday morning get-together, and she was the best hostess. There was always a fantastic assortment of food. I remember banana bread with this spread. I could always count on this delicious combo at her house!

At the brunches, I remember a lot of story-telling, a lot of laughing, a lot of eating, a lot of nail painting, and a lot of trying on jewelry (that would only be my sister and me…we could never get enough of Nancy’s jewelry collection). That sweet lady traveled with so much jewelry for such a short weekend! Those are such good memories.


Enjoy this spread—it is especially tasty on cold slices. It has just the right amount of tang, and it’s a great balance to the bread. I like to use raspberry preserves with the seeds…I feel like the seeds make the spread. I hope you find it as delicious and memorable as I do!

Creamy Raspberry Spread
Source: Ashley original

4 oz. cream cheese, room temperature
2 Tbsp. raspberry preserves (I like it with seeds), room temperature

Combine the cream cheese and raspberry preserves in a small bowl. Mix well with a small spatula or spoon until well combined. Serve with banana bread.