Pages

Showing posts with label Appetizers. Show all posts

Monday, November 25, 2013

Turtle Popcorn


I have a confession.

You know those popcorn tins that pop up (pun totally intended) in stores this time of year? Yeah, I love them.

I have another confession.

You know those popcorn tins that have the trio of flavors—butter, cheese, and caramel? I always go for the cheese first. I don’t care if it gives me orange fingers. Then I go for the butter. THEN I go for the caramel.


I’ve just never really been a caramel corn fan. Maybe it’s because the caramel corn in those tins almost tastes bitter? Too syrupy? Am I the only one that thinks this?

But let me tell you. If those holiday tins included this Turtle Popcorn, I’d be all over it. Sorry, cheese and butter. It’s not you, it’s me. Well, it’s actually that this Turtle Popcorn is irresistible in all sorts of ways.

It starts with stove-top popcorn. That’s right. I went all old-fashioned, and I made popcorn on the stove for the first time ever. And I’m hooked. It’s so fun. It’s so delicious. And it’s so easy! I decided to keep it local, and I used Lakota Popcorn, which is popcorn grown and harvested by the Lower Brule tribe of South Dakota. Love it.


With stove-top pop, the key is making sure the oil is hot before the kernels are placed in the pot with it. One kernel of popcorn should be placed in a large pot with the oil. Once the kernel pops, it means the oil is hot and the rest of the kernels can be added. It’s important that there is enough room in the pot so each kernel touches the bottom of the pot. Once the kernels are thrown in, cover the pot with a lid. While seeing the lid stays on, slightly shake the pot to promote popping and to prevent burning. Before you know it, you’ll have a huge pot of popcorn.

What I love about this popcorn is the buttery, sweet, and salty caramel coating. Despite ingredients that you’d think would make the caramel heavy (like brown sugar, butter, and corn syrup), it’s anything but heavy. In a weird way, the caramel is kind of light, so you’ll keep eating and eating Turtle Popcorn before realizing the damage done. I totally speak from experience.


The caramel-y popcorn is tossed with pecan pieces and it is baked in a low oven. Every so often, the popcorn is stirred—or rather scooped and redistributed on a large jelly roll pan. Mini chocolate chips are thrown in at the end. I decided to throw half the chocolate chips during the last 15 minutes of baking, and I sprinkled the remaining half once the popcorn was out of the oven. I like my chips a little melty, but it’s up to you.

This Turtle Popcorn is so addictive. The salty and sweet caramel combined with chocolate and the nutty texture of the pecans is definitely a winner. What I love about this recipe is that it makes a big ol’ bowl full. I’ve got just the idea: you could totally make your own holiday popcorn tins this year. Your family, friends, and neighbors would love you for it.


Turtle Popcorn

For popcorn
5-6 Tbsp. canola oil
2/3 cups unpopped popcorn

For topping
1 cup brown sugar, packed
1/2 cup unsalted butter
1/4 cup white corn syrup
3/4 tsp. sea salt
Pinch cream of tartar (using your thumb and index finger, just pinch the cream of tartar and add)
1/2 tsp. pure vanilla extract
1/2 tsp. baking soda
1 cup pecan pieces
1 cup mini semi-sweet chocolate chips

In a large, covered pot, heat the oil and 1 kernel of popcorn. After the kernel pops, pour in 2/3 cup popcorn and recover. Shake the pot frequently until all the corn in popped. Remove all loose kernels.

Preheat oven to 250F degrees. In a medium saucepan, bring to boil brown sugar, butter, corn syrup, sea salt, and cream of tartar. Boil for 5 minutes, stirring frequently. Remove from heat and add vanilla extract and baking soda. Drizzle half of caramel over the popcorn and sprinkle with 1/2 cup pecan pieces. Using a spatula or wooden spoon, stir the popcorn well. Drizzle the remaining caramel over the popcorn and sprinkle the remaining pecans, and stir the popcorn well. Pour popcorn onto a parchment-paper-lined jelly roll pan and spread out popcorn. Bake for one hour, stirring (or rather scooping and re-spreading out) popcorn every 15 minutes. Chocolate chips can be sprinkled over popcorn during the last 15 minutes of baking or once out of the oven. Spread onto parchment paper on counter to cool. Makes approximately 4 quarts of popcorn.

Recipe adapted from Patty B., Norfolk Unit 16), and Jean B., Cook Unit 360, originally found in the Cooking with Pride cookbook by the American Legion Auxiliary Department of Nebraska 2010.

Monday, February 11, 2013

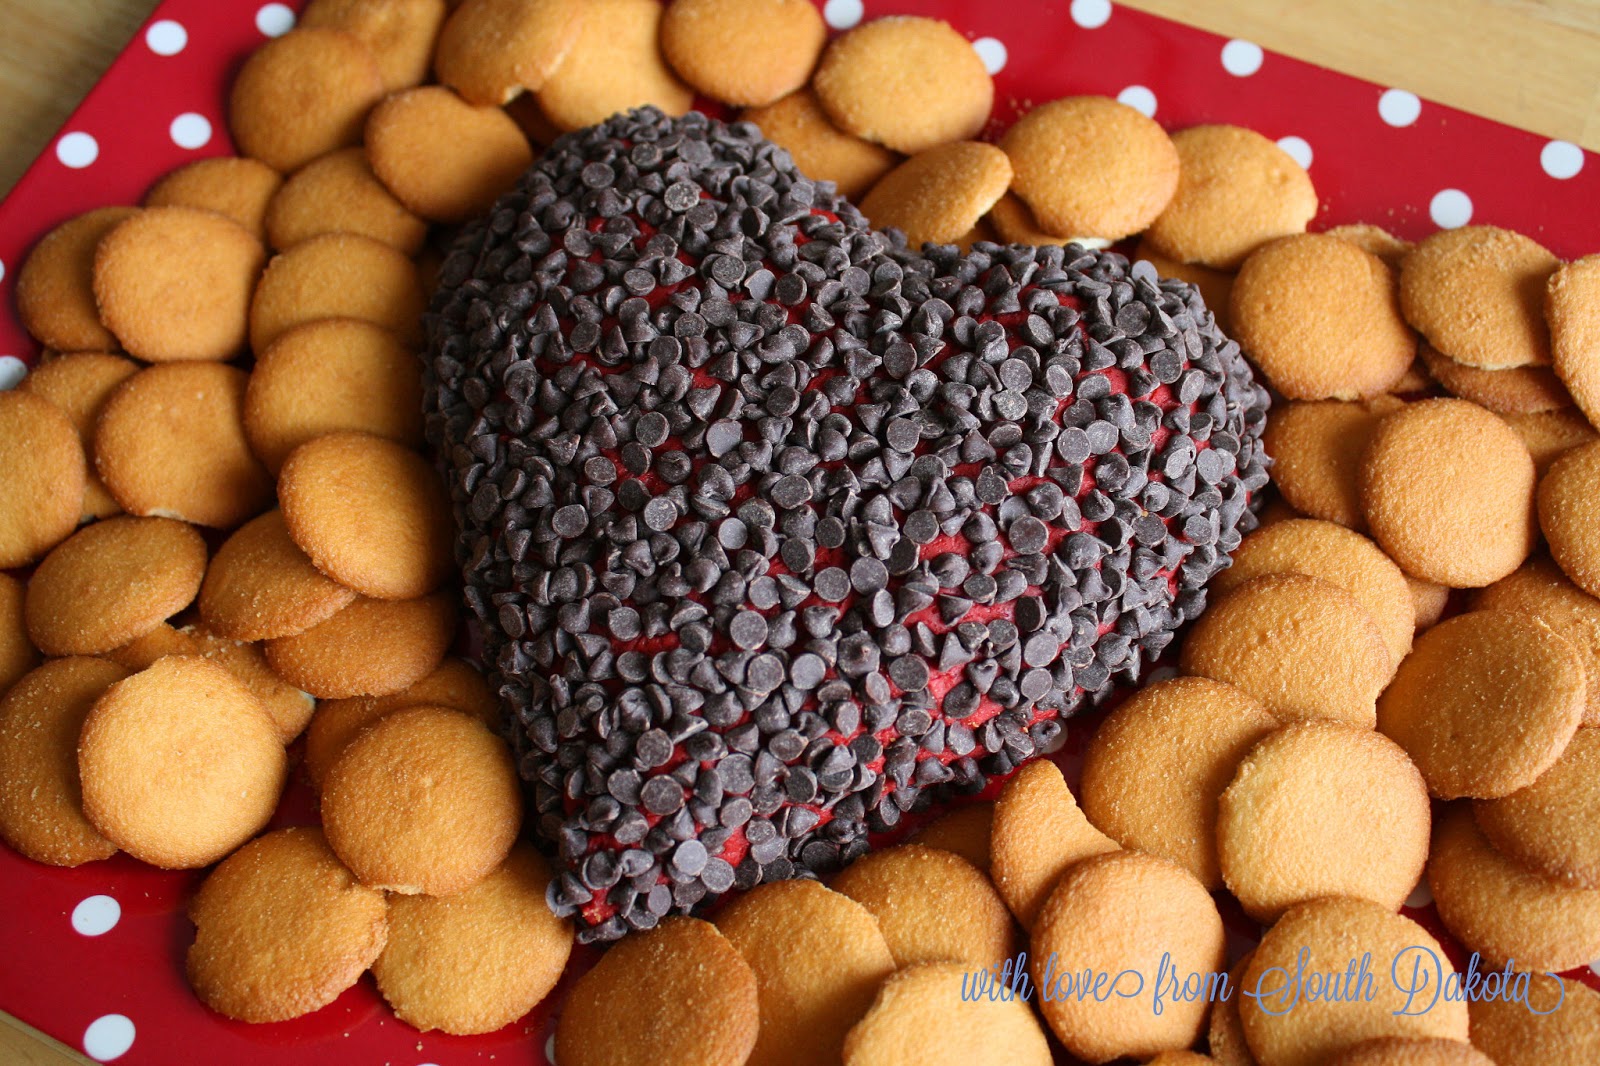
Red Velvet Cheesecake Heart


Hooray for Valentine’s Day! I will admit that before I became a mom, I wasn’t really a fan of Valentine’s Day. Maybe because I wasn’t into all the mushy-gushy stuff. Maybe because I thought (and still do, actually) that love should be shown all days of the year. Maybe because my birthday falls exactly one week before, and well, I don’t like my day being overshadowed by hearts and shades of red. Wow, that makes me sound like a total diva.

Things have changed. I am so excited for Valentine’s Day this year. My oldest, Garrison, is at a fun age to enjoy the holiday. Every time he sees a heart, he excitedly exclaims “Balentine’s day!” (and yes, that’s Valentine’s with a “b”). It’s so cute, and it really has me looking forward to celebrating this week! I am sure you can imagine how big his eyes were when he saw this beautiful Red Velvet Cheesecake Heart.


I pinned this recipe not too long ago, and I knew it would be a must-make this year. I was so excited to attend a potluck and Make-A-Wish fundraiser over the weekend. I’ll give you one guess for what I made. This cheesecake heart? You bet!

This dessert is such a breeze to prepare, and the ingredients are simple. I’m a lover of made-from-scratch cooking and baking, but sometimes boxed cake mixes are the way to go, and this was an instance in which I was glad to use a mix. The color of the heart, from the cake mix, is so gorgeous. The mini chocolate chips are great for finishing the heart, and they add a wonderful texture that complements the smoothness of the cheesecake and the crunchiness of the cookies.


Everyone you serve this to will be oohing and aahing over it. Guaranteed. It’s such a feast for the eyes and the tummy.

We’ll be celebrating the V-Day with our traditional heart-shaped homemade pizza—this year it will be barbeque chicken—and chocolate-covered strawberries. I can’t wait to spend the evening at home with my hubs and our two little Valentines!


Do you have any big plans? Please share! I wish you the happiest Valentine’s Day! Xoxo.


Red Velvet Cheesecake Heart
Adapted from: Fab Food 

8 oz. Neufchatel cheese or cream cheese, room temperature
1/2 cup unsalted butter, room temperature
1-1/2 cups red velvet cake mix, dry
1/2 cup powdered sugar
2 Tbsp. light brown sugar, packed
1/2 to 3/4 cup mini semi-sweet chocolate chips
Assorted cookies

In the bowl of a stand mixer, beat the cheese and butter until well combined and smooth. Add the cake mix, powdered sugar and brown sugar. Beat until well combined and smooth. Turn the mixture onto piece of plastic wrap. Using buttered fingers or a spoon, shape the cheesecake mixture into the shape of a heart, making the shape about 1-inch to 1-1/2-inches high. Wrap tightly in plastic wrap and place in the refrigerator for at least 2 hours.

Unwrap the cheesecake heart and place the bottom (flat side) on a serving plate or platter. With a small handful of chocolate chips, gently push the chocolate chips into the heart. Repeat until the heart is fully covered. Remove from the refrigerator about 20 minutes prior to serving. Serve with assorted cookies. Serves around 16.

Tuesday, January 22, 2013

Spicy Peanut Chicken Cups + Crunchy Lettuce Toss


What a fantastic long weekend we had. My mom visited, and the boys loved the attention from Grandma (although they missed Grandpa…darn work—but fun!—trip to Hong Kong, Vietnam and Taiwan). We had a lot of fun: we shopped, we went to the Children’s Museum, we played (a lot!), and we ate (duh!). I’m so excited to share with you the stars of the weekend menu. 

Spicy Peanut Chicken Cups and Crunchy Lettuce Toss are the perfect meal combination. The chicken cups definitely bring the heat and have such a great flavor. The salad is coated with a delightfully sweet yet tangy vinaigrette. What makes the lettuce toss extra special is the addition of broccoli and toasted ramen noodles. Seriously, what’s not to love? My husband couldn’t get enough of both! And would you believe that my three-year-old actually ate the salad? I can’t even make that up.

The beauty of the chicken cups is that there is a lot of room to alter the recipe to suit your own taste and to yield as many as you want. I used a bottled peanut sauce, but Closet Cooking’s Thai Spicy Peanut Sauce would be extra-fantastic. Although I intended to add chopped water chestnuts to the chicken mixture before baking, I completely forgot! I actually developed this recipe as a way to use up the remaining won ton wrappers from our Taco Cups we had earlier last week.


Spicy Peanut Chicken Cups
Source: Ashley original

Cooked, shredded chicken breasts
Peanut sauce (I used House of Tsang Bangkok Padang Peanut Sauce)
Won ton wrappers
Green onions, chopped
Fresh cilantro, chopped
Dry roasted peanuts, chopped

Combine chicken and peanut sauce in a bowl. Use as much peanut sauce as you prefer (I used enough peanut sauce to coat the chicken generously, but I didn’t want the mixture too runny). In a mini muffin pan, place as many won ton wrappers in the cups as you are planning to make. Make sure you push the wrappers gently into the wells; you may need to fold the sides to get a good fit. Spoon in the chicken mixture into each wonton wrapper being careful not to fill too full (you will want to leave room for the toppings). Bake at 350 degrees for 8-10 minutes (or until the wrappers have slightly browned). Top cups with green onions, cilantro and peanuts.   


Crunchy Lettuce Toss
Adapted from: Taste of Home

1/2 cup sugar
1/2 cup vegetable oil
1/4 cup cider vinegar
2 tsp. soy sauce
Salt and pepper, to taste
1 pkg. (3 oz.) ramen noodles, broken
2 Tbsp. butter
1 1/2 cups chopped broccoli
1 small bunch leaf lettuce, torn
5 green onions, thinly sliced
1/2 cup chopped walnuts

To make the vinaigrette, combine sugar, oil, vinegar, soy sauce, salt and pepper in a jar with a tight-fitting lid. Shake well. Discard the seasoning packet from the ramen noodles or save for another use. In a skillet, sauté the ramen noodles in the butter until golden brown (be careful because once they start to brown, they brown fast!). In a large bowl combine lettuce, broccoli, and onions. Just before serving, toss in noodles and walnuts. The vinaigrette may be drizzled over the salad (and tossed again) or it can be served separately (my preference). 


If you are living in the Land of the Cold, I hope you are staying warm. The wind chill was -30 degrees yesterday. Woof. As cold as it gets, it sure is pretty around here. I am thankful for beautiful South Dakota sunsets. Truly spectacular. And definitely no photo editing needed.

  
I was not compensated to use House of Tsang Bangkok Padang Peanut Sauce. The opinions expressed in this blog are my own.